
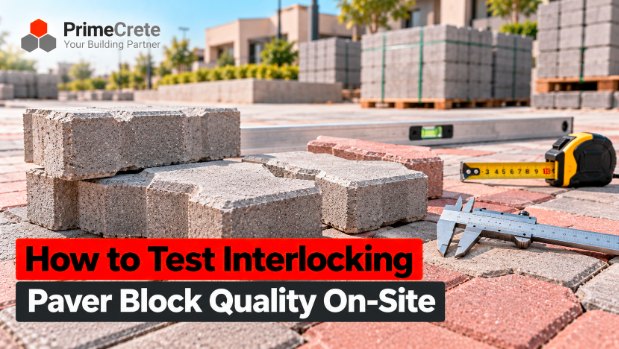
A truck of Interlocking Paver Block pavers arrives, the labour is waiting, and someone has to decide in the next twenty minutes whether to accept the load. Once those blocks are compacted into a driveway or parking area, rejecting them becomes very expensive.
At PrimeCrete, we produce interlocking pavers on automated equipment at our Hattar plant, and we encourage buyers to check every delivery properly. This guide explains which quality checks you can do on site with simple tools, which ones need a laboratory, and how to combine both into a practical acceptance routine for projects in Pakistan.
The Short Answer
You can check interlocking paver block quality on site by verifying the delivery paperwork, measuring thickness and dimensions on a random sample, inspecting for cracks, chips and surface defects, dry-laying a trial panel, and checking colour consistency. Site checks catch obvious defects, but strength and water absorption need laboratory testing on samples taken from the delivery.
What Are You Actually Testing For?
An interlocking paver is a solid precast concrete unit shaped to lock with its neighbours, so that loads spread across the pavement through the joint sand. Its quality comes down to four things: dimensional accuracy, compressive strength, water absorption (a proxy for durability), and surface condition.
The project specification should define acceptance limits for each. As a reference, the Concrete Masonry & Hardscapes Association’s construction guide for interlocking concrete pavements summarises ASTM C936 requirements as a minimum average compressive strength of 55 MPa, average absorption of no more than 5%, and dimensional tolerances of ±1.6 mm on length and width and ±3 mm on height. Pakistani projects may specify a different standard or class, so always check against your own project documents.
Step 1: Check the Paperwork Before Unloading
Start with the delivery note, not the pavers. Confirm that the shape, thickness, colour and strength class match the purchase order. Ask for the manufacturer’s test certificate for the batch, and note the batch or production reference so you can trace it later.
A load with no batch reference and no test data is not automatically bad, but it leaves you nothing to check against if problems appear.
Step 2: Take a Random Sample From Several Pallets
Do not inspect the top layer of the first pallet and call it done. Pick units from different pallets and from different levels within each pallet. A sample of around ten units across the load gives a fair picture for the site checks. The laboratory sample size should follow the project specification or the test standard.
Step 3: Measure Thickness and Dimensions
Thickness matters most, because the pavement design assumes it. CMHA notes that pedestrian areas and driveways typically use 60 mm units, while streets and industrial pavements need at least 80 mm. A paver that is undersized for its traffic will crack or rock under load.
Use a vernier caliper or a good steel rule. Measure the thickness at several points on each sampled unit, plus the length and width. Record every reading. Compare the results with the specified size and tolerance. Inconsistent thickness also causes uneven surfaces after compaction, because thin units sit lower in the bedding sand.
Step 4: Inspect the Surface and Edges
Look at each sampled unit under good light. Check for:
- Cracks through the body of the unit
- Chipped corners and edges (arrises), beyond normal handling marks
- Delamination, where the top face layer separates from the body
- Honeycombing or open, poorly compacted texture
- Warping, by placing units on a flat surface and checking for rocking
A few handling chips in a large load are normal. Widespread cracking, flaking faces or crumbling edges are not.
Step 5: Dry-Lay a Trial Panel
Lay roughly one square metre of pavers on a flat surface in the intended pattern. This shows whether the units interlock properly, whether the joints stay consistent, and whether the colour looks acceptable as a group. CMHA’s guide gives typical joint widths of 2 to 5 mm. Units that will not sit together within that range point to dimensional problems.
While you are at it, check colour across pallets. CMHA recommends laying from three or four bundles at a time to blend minor shade differences. Some variation is normal for concrete. Clearly different colours within one order should be raised with the supplier before laying.
Step 6: Simple Field Indicators (Use With Caution)
Some site teams use quick indicators. A well-made, well-cured paver usually gives a clear ring when tapped with another unit, and resists scratching with a steel nail. A dull thud or easy scratching can point to under-compaction or poor curing.
Treat these as screening signals only. They help decide which loads deserve lab samples. They do not measure strength, and nobody should accept or reject a load on a nail scratch alone.
What Site Checks Cannot Prove
No site check can tell you a paver’s compressive strength or its long-term durability. Two units can look identical and measure identically yet perform very differently, because strength depends on the concrete mix, compaction during manufacture and curing. Our article on how concrete mix quality affects paver life explains why.
For anything carrying vehicles, send samples to a materials testing laboratory. Typical tests to request, as the specification requires, include:
- Compressive strength (or splitting tensile strength, if the project uses a standard that specifies it)
- Water absorption
- Dimensions, measured under laboratory conditions
- Abrasion resistance, where the specification includes it
Take the samples from the delivered load, label them with the batch reference, and keep a record of which area of the site each batch went into.

On-Site Acceptance Checklist
| Check | Tool | What acceptable looks like | If it fails |
| Delivery paperwork | Delivery note, test certificate | Matches order; batch traceable | Hold the load; ask supplier for documents |
| Thickness | Vernier caliper | Within specified size and tolerance | Measure more units; reject if widespread |
| Length and width | Caliper or steel rule | Within specified tolerance | Check fit in trial panel |
| Cracks, chips, delamination | Visual, good light | Only minor handling marks | Set aside defective units; record quantity |
| Fit and joints | 1 m² dry-laid panel | Consistent joints, units interlock | Raise with supplier before laying |
| Colour | Units from several pallets | Normal variation only | Blend bundles or query supplier |
| Strength and absorption | Laboratory test | Meets project specification | Do not lay the batch until resolved |
Who Should Check What
- Site engineers: sampling, measurements, lab sample dispatch and records
- Contractors: trial panel, handling, segregating rejected units, blending bundles
- Procurement: clear specification on the order, test certificates, batch traceability
- Homeowners: asking to see the delivery note and test certificate, and the trial panel before full laying
Common Mistakes to Avoid
- Inspecting only the top layer. Defects often hide deeper in the pallet.
- Judging strength by appearance. A smooth, bright face says little about the concrete beneath it.
- Testing after laying. By then, removal costs far more than a day’s delay.
- Ignoring thickness for vehicle areas. Thin units under heavy wheels fail no matter how strong the concrete is. See our guide on whether interlocking pavers can handle truck loads.
- Blaming the paver for base failures. Sinking and rutting usually start in the sub-base, compaction or drainage, not in the block.
A paver can pass every test in the lab and still sink in a month if someone treats sub-base compaction as an optional hobby.
Frequently Asked Questions
Can I test paver strength on site without a lab?
Not reliably. Tap and scratch tests can flag suspicious units, but they do not measure compressive strength. For driveways, parking areas and roads, send samples to a testing laboratory and compare the results with the project specification.
How many pavers should I sample?
For site checks, around ten units taken from different pallets gives a reasonable picture. For laboratory testing, follow the sample size in your specification or the relevant test standard, and take samples per batch rather than per truck where batches are mixed.
What thickness of paver should I check for a driveway?
It depends on traffic and the pavement design. CMHA’s guidance uses 60 mm for pedestrian areas and driveways and at least 80 mm for streets and industrial areas. Your project drawings should state the required thickness, and the delivery must match it.
Is colour variation a defect?
Minor shade variation is normal in concrete products and blends out when you lay from several pallets at once. A clearly different colour within one order is worth raising with the supplier before laying.
Conclusion
Good on-site testing of interlocking pavers is quick and systematic: check the paperwork, sample across pallets, measure thickness, inspect the surface, dry-lay a trial panel, and send samples to a lab for strength and absorption. Do it before laying, while rejection is still cheap.
If you are planning a driveway, parking area or housing-society road and want to confirm paver thickness, shape or test documentation, explore PrimeCrete’s interlocking paver blocks or contact our team with your project details.
